Commit 날짜 변경하는 방법 정리


개발자라면 1일 1커밋 운동을 목표로 열심히 잔디를 심는 경우가 많다.

나처럼 게으른 개발자 취준생은 이따가 해야지 5분만 잤다가 일어나서 해야지 하다가 다음날 새벽에 일어나는 경우

커밋을 못해 비어있는 칸에 잔디심는 방법을 정리해서 간간히 써먹어 보려고 한다.


Commit 날짜 변경 방법


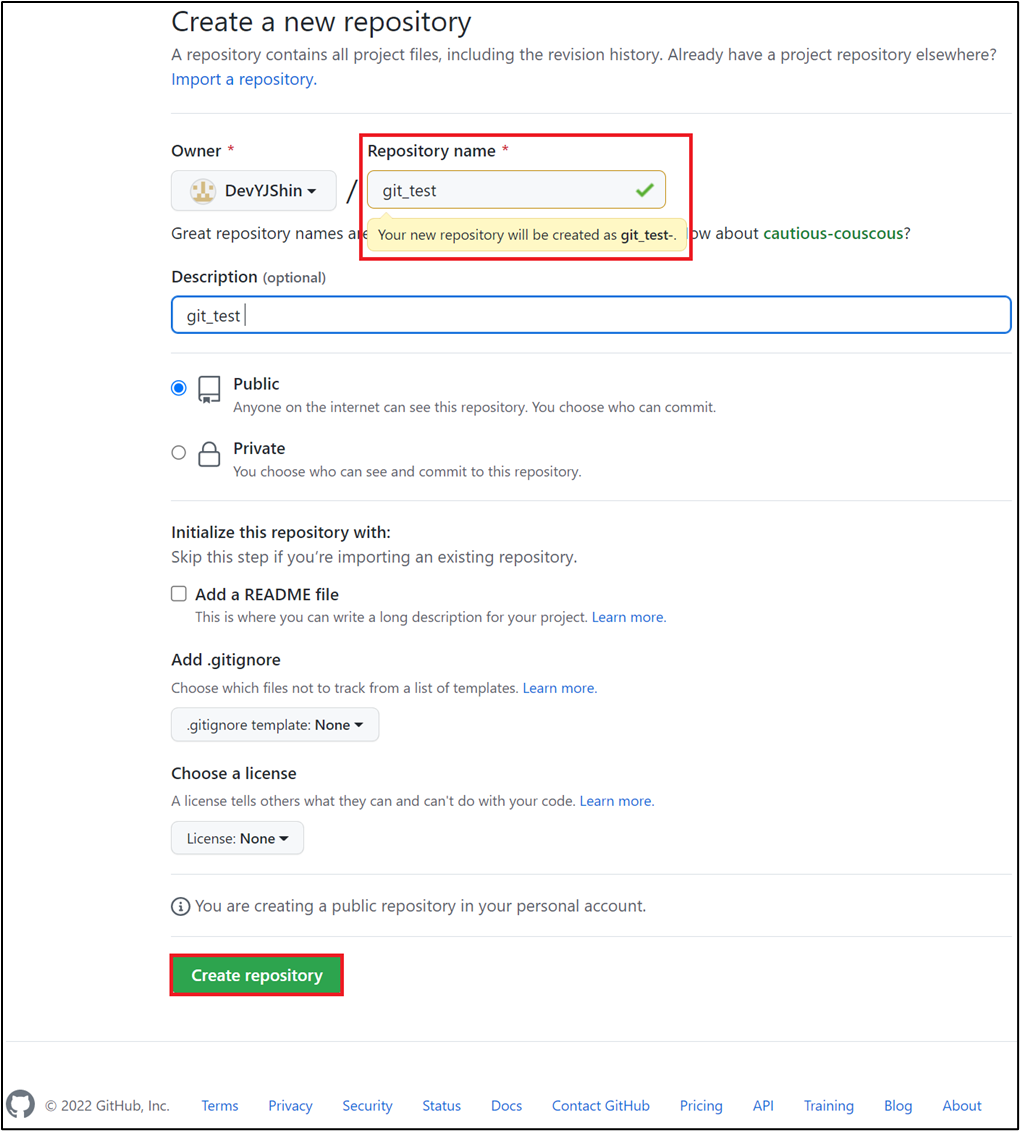
1. Github Login 후 우측 상단에서 + 모양 클릭 → New repository 마우스로 클릭

2. Repository Name 입력 → Public 선택 → Create repository 마우스로 클릭


3. 커밋할 폴더를 선택하여 마우스 우클릭 → Git Bash Here 마우스로 클릭

4. 초반 세팅 명령어

git init   # 새로운 repository를 만들고 Git으로 프로젝트 관리를 시작할 때는 다음 명령어을 입력
git status # Git으로 작업을 할 때 어떤 파일이 변경되었는지, 추가되었는지 등 전부 확인 가능
git add .  # 폴더 내에 있는 파일 전체 add

# 다른 방법

git init
vi test3.txt
git status
git add .  # 폴더 내에 있는 파일 전체 add
git add test3.txt


5. Commit 명령어 실행

git commit -m "Commit Message" # 명령어
git commit -m "first commit"   # 실제 사용한 명령어


6. Repository에 Code Push

git remote add origin [repository 주소]
git remote -v
git push -u orign master

### 실제 사용한 명령어
git remote add origin https://github.com/DevYJShin/git_test 
git remote -v
git push -u origin master

7. Commit 여부는 Github Repository Page에서 확인 가능

# git push 명령어를 실행하면 GitHub 유저네임과 비밀번호를 입력
# 성공적으로 push 되었다면 GitHub repository 페이지에서 확인 가능

8. 이제 비어있는 칸에 잔디를 심어보자.

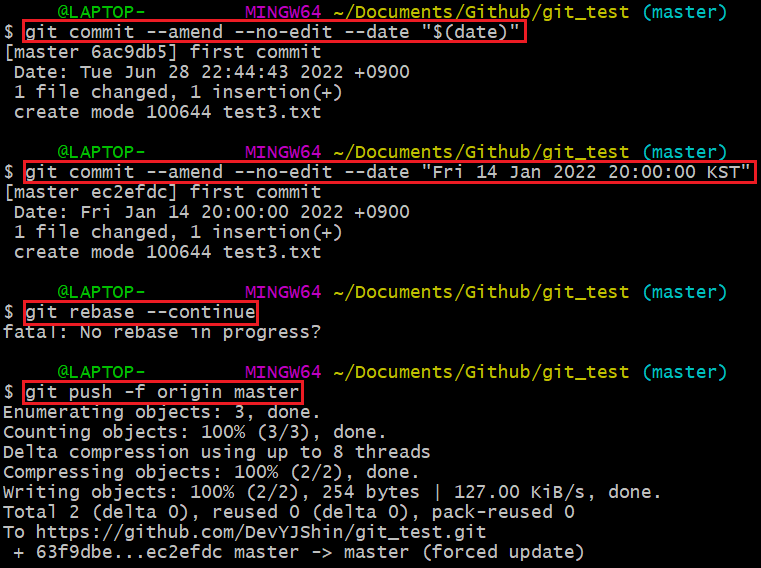
9. Commit 날짜 수정 명령어

Commit 날짜 수정 방법은 과거 Commit과 현재 Commit 2가지가 있는데, 

과거 Commit의 경우 복잡해서 저같은 초보가 건들기에는 어려우니 현재 Commit으로 날짜 수정하는 방법을 정리해보고자 한다.

git commit --amend --no-edit --date "$(date)"
git commit --amend --no-edit --date "Fri 14 Jan 2022 20:00:00 KST"
git rebase --continue      # 굳이 안해도 되나?
git push -f origin master

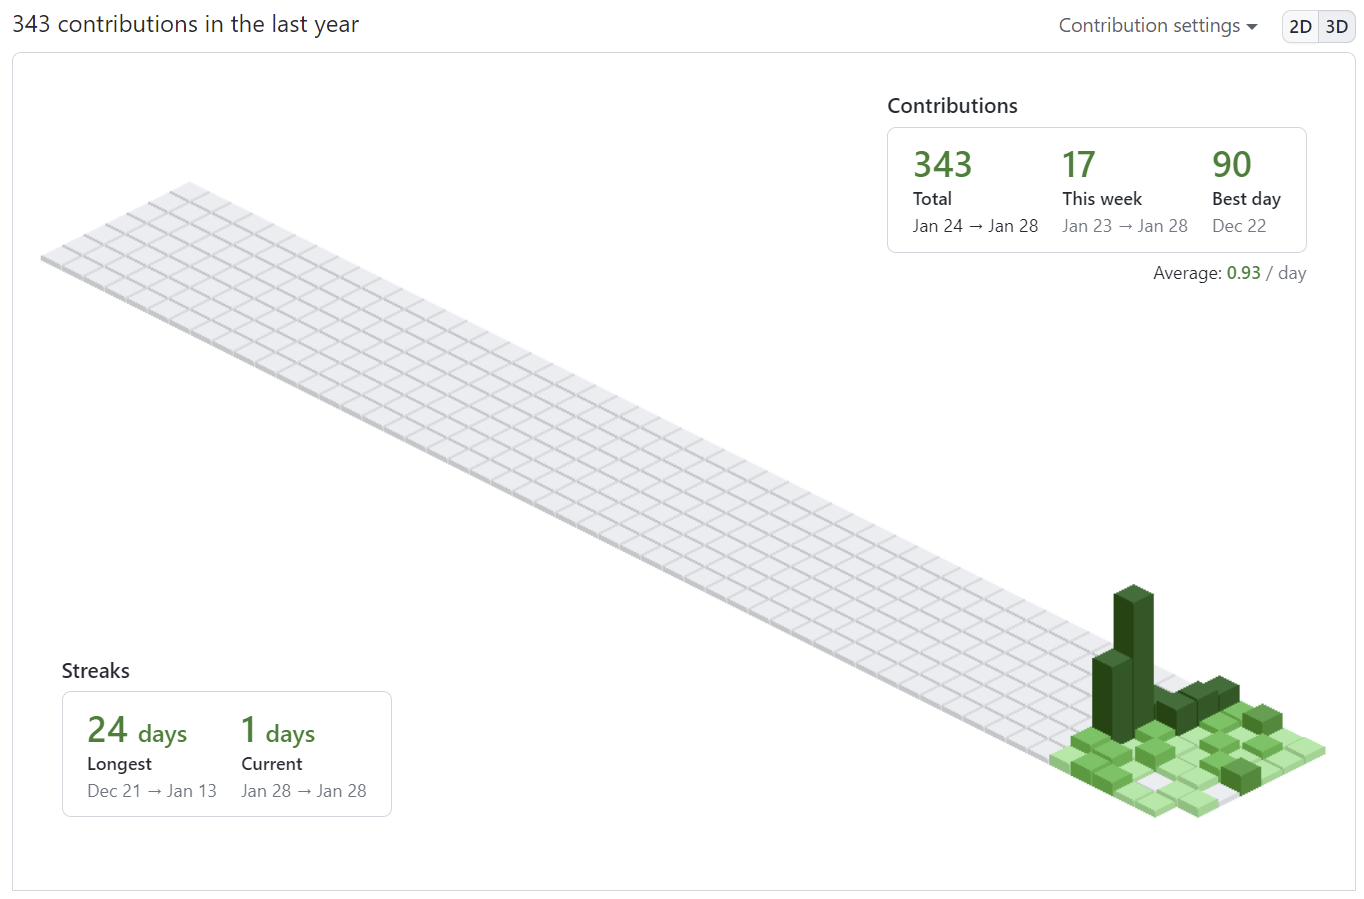
10. Commit 날짜 변경 후 반영 여부 확인


1일 1커밋 미루지 말자 다들 화이팅!


 출처


* Github Commit 방법

https://velog.io/@kho5420/Git-GitHub-%EB%A0%88%ED%8C%8C%EC%A7%80%ED%86%A0%EB%A6%ACRepository-%EC%83%9D%EC%84%B1%ED%95%98%EA%B3%A0-%EC%86%8C%EC%8A%A4-%EC%98%AC%EB%A6%AC%EA%B8%B0

* Github Commit 날짜 수정 방법

https://scl2589.github.io/git/edit-commit-date/


커밋 날짜를 수정하는 방법

Commit 날짜 수정하는 방법을 알아보았습니다.

scl2589.github.io


'Github' 카테고리의 다른 글

[Github] Contribution Color Graph  (0) 2022.01.28
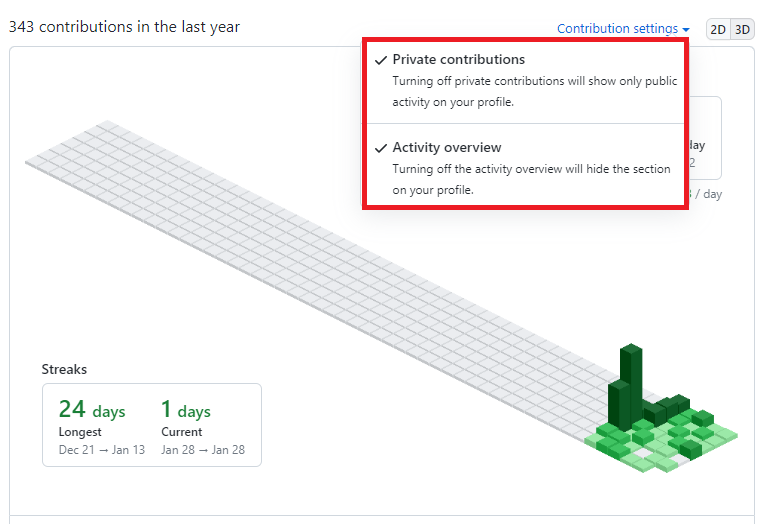
[Github] Activity Overview 설정  (0) 2022.01.28
[Github] Commit Graph 3D  (0) 2022.01.28
[Github] 잔디 먹는 뱀 만들기  (0) 2022.01.01

Step 1. README 생성

https://docs.github.com/en/account-and-profile/setting-up-and-managing-your-github-profile/customizing-your-profile/managing-your-profile-readme


Managing your profile README - GitHub Docs

About your profile README You can share information about yourself with the community on GitHub.com by creating a profile README. GitHub shows your profile README at the top of your profile page. You decide what information to include in your profile READM

docs.github.com

Step 2. yaml file 생성

YOUR_GITHUB_USERNAME --> .github --> workflows --> FILE_NAME.yml

# 커밋 먹는 뱀 그래프 생성을 위한 GitHub Action🐍

name: Generate Snake

# Action이 언제 구동될지 결정

on:
  schedule:
    # 6시간마다 한 번(수정 가능)
    - cron: "0 */6 * * *"

  # 자동으로 Action이 실행되도록 함
  workflow_dispatch:

jobs:
  build:
    runs-on: ubuntu-latest
    steps:
      - uses: actions/checkout@v2

      # 뱀 생성
      - uses: Platane/snk@master
        id: snake-gif
        with:
          github_user_name: [Github 아이디]
          # output branch에 gif, svg를 각각 생성
          gif_out_path: dist/github-contribution-grid-snake.gif
          svg_out_path: dist/github-contribution-grid-snake.svg

      - run: git status

      # 변경사항 push
      - name: Push changes
        uses: ad-m/github-push-action@master
        with:
          github_token: $
          branch: master
          force: true

      - uses: crazy-max/ghaction-github-pages@v2.1.3
        with:
          target_branch: output
          build_dir: dist
        env:
          GITHUB_TOKEN: $


Step 3. Github Action 실행

Generate Snake → Run Workflow


Step 4. 프로필에 추가


![snake gif](https://github.com/YOUR_USERNAME/YOUR_USERNAME/blob/output/github-contribution-grid-snake.gif)


* 참고 링크 1 : https://6h15m.github.io/github/readme/2021/07/20/github-snake.html

* 참고 링크 2 : https://dev.to/mishmanners/how-to-enable-github-actions-on-your-profile-readme-for-a-contribution-graph-4l66?fbclid=iwar2bgcj9b_0owzs_zr5e45y1nbir-9768lyzt1y5a7e4rd4dwwrtauuliss 


====================================================================


개인 액세스 토큰 사용하라고 에러 뜨는데 아직 해결 못하고 있네요 ㅠ

구글링해봐도 이해가 안되네요. 


+ Recent posts